HOW TO INSERT A TABLE IN BLOGGER POST.
Have you been wondering how to create a table in blogger post? or how to insert a table in your post? here is a solution for you. In this article, i will show you how to add a table in a post using blogspot.
ADDING TABLE IN BLOGGER POST.
1. search draft.blogger.com
Open any browser of your choice and search for draft.blogger.com
After clicking on draft.blogger.com, [make sure you identify the difference betweenn blogger.com and draft.com] you now login to your blogger account and click on create new post or click on the blogger post you wish to add a table to
3. Click the three dots to add a table in blogger post
Now look at the top right corner of the create blogger post screen. You will find 3 dots. Click on the 3 dots and you will get a popup. Click on table then finally click on insert table to add a table to your blogspot post
4. Edit table in blogger post.
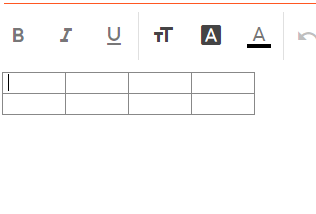
Now that your table has been added to your blogspot post, you can now customize the number of rows, columns or any thing you like to do.
CONCLUSION ON INSERTING A TABLE TO BLOGGER POST.
As you have seen above, this is actually an easy way to add a table in your blogger post without using html ot some programming. You have to be no expert to add a table in your blogger post. So all you need to do to add a table in a post in using blogspot is to
- Open browser and search draft.blogger.com
- login and create new post or edit post
- click the 3 dots at the top rigth corner
- insert and edit table
If you have any difficulty in creating a table in your post in blogger, then leave a comment below.


Comments